Today was the first leg of our road trip! We knew it would be the roughest drive for the whole trip but it actually turned out to be a bit worse. We thought it would be about 9.5 hours but our directions were wrong so it was more like 12. Most of the drive was dull and boring, scenery wise, and the whole drive was under cloud cover, but boy is it gorgeous in PA and WV! It's really hilly and green. Another fun surprise was that the song Billie Jean came on the mp3 player, randomly, while we were driving through Gary, IN!
We're relaxing here at our nice hotel in Morgantown, WV. I can tell it's a pretty place, even in the dark. I look forward to seeing it in the day time.
Anyone who has ever worked with me will find it pretty funny that I ate Panera today for a very late lunch but it ended up saving my life! When we arrived in Morgantown at about 10:00pm the only thing open was a 24 Hour McDonalds and I can't eat that crap.

Wednesday, May 12, 2010


Sunday, May 9, 2010
Road Trip Itinerary
Out road trip is mostly planned out! The worst leg of driving will probably be the first day. We're leaving early and trying to get to West Virginia that day.
May 12th: leave Milwauke early for WV
May 13th: hang out in WV - Morgantown, maybe other places?
May 14th: Philadelphia
May 15th: Connecticut and Rhode Island
May 16th: Boston
May 17th: Salem
May 18th: Portsmouth, NH
May 19th: Portland, ME and the Shaker Village in Sabbath Day Lake, ME
May 20th: Pittsburgh
May 21st: Toledo, OH
May 22nd: home!
May 12th: leave Milwauke early for WV
May 13th: hang out in WV - Morgantown, maybe other places?
May 14th: Philadelphia
May 15th: Connecticut and Rhode Island
May 16th: Boston
May 17th: Salem
May 18th: Portsmouth, NH
May 19th: Portland, ME and the Shaker Village in Sabbath Day Lake, ME
May 20th: Pittsburgh
May 21st: Toledo, OH
May 22nd: home!
Thursday, May 6, 2010
Road Trip Reading List
Even though this blog is primarily for my crafting endeavors, I'm going to be turning it into a travel log for our upcoming New England road trip. I want to remember and document everything as we go instead of doing it all at the end.
We leave in 6 days! The itinerary isn't completely set yet but I sure do have a reading list planned out.
Ellie:

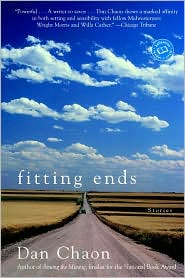
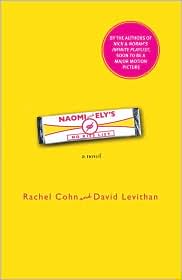
Dan:

Audio CDs:



Thursday, April 22, 2010
Tropical Dress
I finally finished Dress #2! I used McCall's pattern M5845 and fabric my aunt gave me. This dress was definitely a challenge. Since there is a lining, it's like making two dresses and doing double of everything, including pesky darts. The darts made it look polished and tailored though, so they're worth it. Having only done two before in my life, it was daunting to do about 30 of them, in total, some of which were topstitched.


 Now I am on the hunt for a wide brown woven belt. It has been surprisingly hard to find just the right one!


Sunday, April 4, 2010
Egg Salad
I'm still working on dress #2! It's going well so far, but I think it will take me another few weeks. In the meantime, enjoy my sister's fabled recipe for egg salad.
Like a good runny brie cheese, this egg salad should be made when the eggs are still warm.
Ingredients:
6 hard boiled eggs
3 second squirt of yellow mustard
3-4 large T Hellman's Mayonnaise (eye it for creaminess)
1 t Kosher salt
In a bowl cut up the eggs into small to medium chunks; careful to not overmix
Add a 3 second squirt of yellow mustard
Add about 3 large tablepoons of mayo
Add 1 t salt
Fold ingredients together; taste.
This recipe is so simple and I've tried it twice but it never tastes as good as my sister makes it. I'm thinking the secret ingredient is magic.

Like a good runny brie cheese, this egg salad should be made when the eggs are still warm.
Ingredients:
6 hard boiled eggs
3 second squirt of yellow mustard
3-4 large T Hellman's Mayonnaise (eye it for creaminess)
1 t Kosher salt
In a bowl cut up the eggs into small to medium chunks; careful to not overmix
Add a 3 second squirt of yellow mustard
Add about 3 large tablepoons of mayo
Add 1 t salt
Fold ingredients together; taste.
This recipe is so simple and I've tried it twice but it never tastes as good as my sister makes it. I'm thinking the secret ingredient is magic.

Tuesday, March 9, 2010
Coffee Date Dress
My next sewing project was a lofty one, as I've never made a piece of clothing before. My friend Jess introduced me to the BurdaStyle website and we found a great, free dress pattern, the Coffee Date Dress. BurdaStyle is a great, collaborative community for people of all sewing abilities to find free or cheap patterns and share their own projects. Usually, the patterns have detailed instructions but for some reason this one did not, so we were on our own.
We raided my aunt's fabric stash and I came away with two gorgeous tropical prints and some peach lining fabric. I decided to start with the gray and white print since it didn't need a lining. No need to make my first project harder by making a lining (essentially a second dress) when the pattern doesn't even have instructions in the first place!
Here is the pattern cut out and pinned to the fabric:
 I started piecing the bodice together. Here it is almost done:

This pattern is for an A-line skirt, which I don't really like, so I took it in a lot at the sides and back. Here is the bodice and skirt ready to be joined together:

The pattern also calls for a ruffle at the front of the bodice. I played around with the ruffle but I decided not to use it. With this bold and busy pattern I found that the ruffle blocks a lot of nice pattern on the bodice and looks jumbled when folded up like that.
The finished dress with the perfect red belt!


Overall, I couldn't be happier with the way it turned out. Stay tuned for pictures of my friends' dresses using the same pattern! As usual, I couldn't do it without my ladies, so, a shout out to MaryLee, Amy, Jess and my mom!
We raided my aunt's fabric stash and I came away with two gorgeous tropical prints and some peach lining fabric. I decided to start with the gray and white print since it didn't need a lining. No need to make my first project harder by making a lining (essentially a second dress) when the pattern doesn't even have instructions in the first place!
Here is the pattern cut out and pinned to the fabric:


This pattern is for an A-line skirt, which I don't really like, so I took it in a lot at the sides and back. Here is the bodice and skirt ready to be joined together:

The pattern also calls for a ruffle at the front of the bodice. I played around with the ruffle but I decided not to use it. With this bold and busy pattern I found that the ruffle blocks a lot of nice pattern on the bodice and looks jumbled when folded up like that.
The finished dress with the perfect red belt!


Overall, I couldn't be happier with the way it turned out. Stay tuned for pictures of my friends' dresses using the same pattern! As usual, I couldn't do it without my ladies, so, a shout out to MaryLee, Amy, Jess and my mom!
Sunday, February 14, 2010
Ruffle Pillow
I found a great tutorial on Etsy.com for an adorable ruffle pillow. It seemed doable, so I gave it a shot. I bought some 20% wool cream colored felt for $7.99 per yard (felt is expensive!) and matching thread at the fabric store.
Not only is Sprecher Cherry Cola the most delicious drink, it also helped with tracing the 60 3" circles I needed for the ruffles. I used my blue fabric chalk to make the circles. Unfortunately, some of the circles still had blue chalk on them that could not be on there. All of the edges of the ruffles will show once they're sewed on the pillow. So I had the tedious task of washing each circle. I also ironed them all after they finished drying. Maybe next time instead of tracing all of them, I could just trace one and use that as the pattern for the next and cut around that. I just think that might leave room for messing up the cutting. I'll think about it.

60 circles. They look like potato chips. Not pictured are the two pieces of 11" X 19" panels for the pillow. I elected not to add a zipper as the tutorial suggests.

I hand sewed each disc. I folded it in half, made a few stitches, folded it again and made a few stitches. Next time I think I'll do this step on my machine.

I hand sewed all 60 discs to one of the panels and pinned them right sides together.

I machine sewed three sides. My mom and my nephew stuffed it with poly-fill for me. Such great helpers!


I sewed up the last edge by hand. Here it is, in action!

Subscribe to:
Posts (Atom)